
I have started using Eclipse Che lately because I’m hoping that it can help me stay closer to my code regardless of what device I’m using. This is important to me because I recently assumed a new role at work which puts me in more meetings, many of which are away from my desk or even my laptop. I was logging into clusters and writing Fortran in Vim from my LG Ally a decade ago for massively parallel jobs, so I’m cool with a small screen or a tablet for code editing.
I also like the possibilities that cloud IDEs like Che create for teams, especially new members of those teams. I would be very happy to see Che get us to a point where our interns can commit working code on day 1.
Cloud IDEs are still new though, and Che is no exception. I’ve encountered a number of simple problems while using it, including trouble executing even simple Java classes as regular executables. I created this article to track some of the tips and tricks that I’m picking up along the way, again hoping that it helps out those interns just trying to survive their first day or some of the members of the group I lead when deadlines are looming.
I use Che in both public (Openshift.io) and private clouds (CADES), and I’ve found that it operates differently in each. Where possible, I’ll make every effort to indicate which environment I was using when I encountered an issue or figured something out.
And, yeah, for those who are wondering: Che runs WAY faster on CADES than Openshift! 😛
I will update this article from time to time, so feel free to check back or reach out if there are specific things you would like me to investigate.
Enabling Code Completion
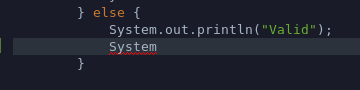
I created the project described in my article on working with the Jena examples in Che using the Eclipse Che launcher and deployment into Openshift.io. The project was not immediately recognized as a Java project and was missing several features, including code completion. Even simple Java packages such as System were not auto completed, as shown below:
I fixed this by turning on the Java Language Server Installer for Che and restarting my workspace. This can be down by editing the “Installers” section of the workspace in question, as shown here:
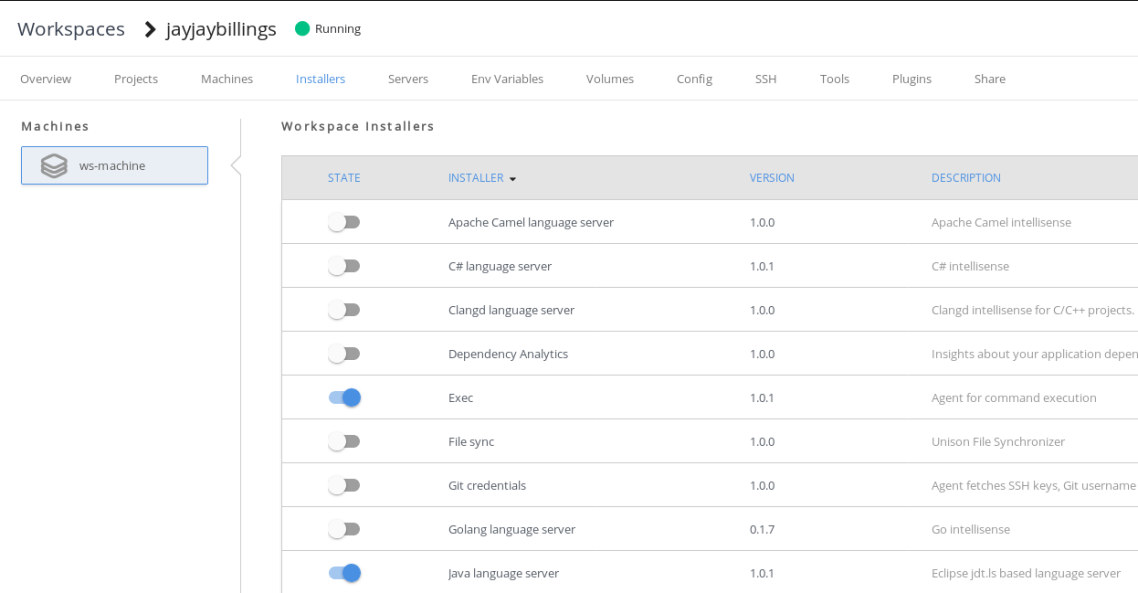
Che uses Languages Servers for providing all the editing support that we have generally come to expect in a modern code editor as well as various text formats such as YAML and JSON. In short, if you want all the editorial goodness you’ve come to expect from Eclipse and other desktop IDES, make sure the language server is turned on it.
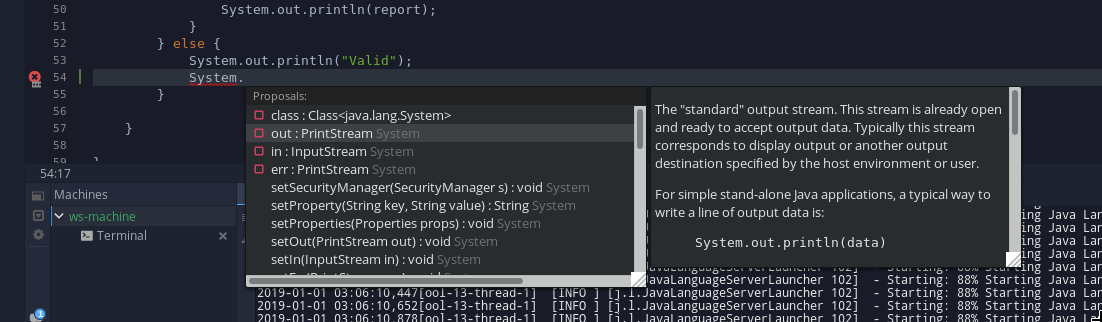
Once I restarted my workspace, this is what I saw after hitting Ctrl+Space:
Setting the Project Nature/Type
Project natures or types provide additional benefits over text highlighting and auto completion, including better file management, custom execution, dependency management, and deep integration with build systems and unit tests. If these things appear to be missing in your Che project, you can set them by modifying the configuration as shown below. Notice that the configuration in the right picture when compared to the picture on the left is missing the language (Java) and build system (maven) parameters.


My project configuration after adding the missing parameters is shown in the picture below, which has a distinctly more Java+maven look to it than when the project nature was not correctly configured.
Contact & Recognition
If you have questions, you can reach out to me on Twitter. Also, I would appreciate it if you would link back to this article if you use the content somewhere else or provide a full academic citation if you use the content in a publication.

You must be logged in to post a comment.